Flying saucer birthday cake

Flying saucer birthday cake

As you might expect, I always bake a cake when my boyfriend’s birthday rolls round. This year, I wanted to put my newly acquired cake decorating skills (such as they are!) to the test and make something a little creative. After coming up with ideas including a Batman cake, Moomin cake, bee cake and snake cake, I settled on something a little more obscure – a cake based on a ship and aliens from a classic arcade game.

Unfortunately, my carefully laid plans went very wrong when I discovered that the extremely hot weather we had earlier in the week had resulted in my Mexican paste pretty much dissolving, so I couldn’t for the life of me cut out the shapes I needed to assemble the spaceship cake topper. After several attempts with various combinations of Mexican paste and sugarpaste, I abandoned the idea altogether and went for a simpler cake, still with a space theme.

So, let’s rewind a bit to the actual making of the cake itself. I wanted to make a Victoria sponge, but my usual port of call for this recipe wasn’t suitable because the cake needed to be heavy enough to take the weight of the sugarpaste icing I originally wanted to put on it. So instead, I made a round madeira cake. It was ridiculously easy to make (especially with an electric whisk handy!) and came out perfectly. I did, however, add some vanilla extract as I felt the recipe really needed it.

Round madeira cake

When it had cooled, I sliced off the domed part to create a flat top, then turned it upside down on to a cake board and sliced it into two layers. Next, I spread a layer of buttercream on the bottom cake and topped it with some strawberry jam before placing the other half of the cake on top. Then, I spread more buttercream all over the top and sides of the cake (I went on to add the sugarpaste layer and unsuccessfully cut out the shapes for the spaceship at this point, then took the sugarpaste off and added extra buttercream when I changed my mind).

Next, I sprinkled some edible silver balls and sugar stars all over the top and wedged five flying saucer sweets into the buttercream with the intention of making it look like the UFOs were flying through space. And that was pretty much it – much quicker than my original plan!

The cake went down extremely well with my boyfriend and the friends we shared it with while tackling the real ale rail trail from Manchester to Dewsbury and back. I thought it was delicious (even if I do say so myself!) and I’ll definitely make the madeira cake again. Whether I’ll attempt to apply my cake decorating skills again, though, is a different matter!

Photo courtesy of Mrs’icks via Flickr

The recipe

For the madeira cake:

  • 250g butter, softened
  • 250g caster sugar
  • 5 eggs
  • 185g plain flour, sifted
  • 60g self-raising flour, sifted
  • 1 tbsp milk
  • 0.5 tsp vanilla extract

For the filling and decorations:

  • 200g butter, softened
  • 280g icing sugar, sifted
  • 0.5 tsp vanilla extract
  • 170g good quality strawberry jam (I used half a jar of Hartley’s Best)
  • Edible silver balls
  • Sugar stars
  • Flying saucer sherbet sweets

1. Preheat the oven to Gas 2-3/160C/315F. Grease a 20cm round cake tin and line the base.

2. Beat the butter and sugar until well mixed, fluffy and light. Beat in the eggs one at a time.

3. Fold in both the flours and stir in the milk and vanilla extract.

4. Transfer the mix to the tin and smooth the top. Bake for 1 hr 25 mins or until a skewer inserted into the middle comes out clean.

5. Leave to cool for 5 mins in the tin, then turn out on to a wire rack and cool completely (if you don’t, the filling will melt!). You can refrigerate the cake for up to 2 weeks or freeze for 2 months at this point.

6. Make the buttercream by beating the butter until it’s creamy and smooth, then beating in the icing sugar a little at a time. Mix in the vanilla extract.

7. Slice off the domed top of the cake and turn it upside down on a cake board. Slice it horizontally through the middle to create two layers.

8. Spread about one-third of the buttercream on the bottom cake layer and dollop the jam on top (try not to spread the buttercream and jam near the edge of the cake – it’ll all move outwards when you put the other cake layer on top).

9. Place the other half of the cake on top and press down gently. If the cake looks lopsided at this point, add more buttercream in the middle where it’s sloping down to make it look level.

10. Spread the remaining buttercream all over the top and sides. It’s okay if it’s not completely smooth!

11. Sprinkle the top liberally with silver balls and sugar stars. Wedge a few of the flying saucer sweets sideways into the buttercream to make it look as if they’re flying through the stars. You can either put the cake in the fridge for a couple of hours to make the buttercream set, or leave it out for more gooey icing.

First bake: lemon, honey and hazelnut muffins

Lemon, honey and hazelnut muffins

It was my turn to bake for charity this week, but I left my planning to the last minute. I rather riskily decided to make something I’d never made before, purely because I already had all the ingredients in – these lemon, honey and hazelnut muffins.

I really liked the sound of this flavour combination and thought nothing could go wrong! Indeed, making the muffins was a cinch, especially with the electric whisk I decided to use to save time. However, things started to go awry when I began spooning the mix into the muffin cases. There seemed to be very little mix in each case, but the recipe definitely says ‘makes 12’, so I baked them anyway, hoping they would rise a LOT.

Lemon, honey and hazelnut muffins, pre-baking

Lemon, honey and hazelnut muffins, pre-baking

Unfortunately, they didn’t. They ended up around the same size as a scone, and not particularly muffin-like! They tasted nice, especially with the honey brushed on top, but they definitely weren’t muffins. I ended up selling them as ‘mini cakes’, and they still sold out, but I wasn’t particularly happy with their size.

The book I used is an American one with all the quantities converted to grams/ounces from cups, so I’m wondering if some of the conversions are incorrect or if Americans mean something different by the word ‘muffins’ compared with what us Brits know them to be!

If I was to make this recipe again, I would probably either halve the recipe and make 6 muffins, or double it to make 12 good-sized ones.

Lemon, honey and hazelnut muffin

The recipe

Taken from Baking by Martha Day.

Re-bake: Milka chocolate and hazelnut cookies

Milka chocolate and hazelnut cookies

I mentioned not too long ago that there’s a cookie recipe in my trusty BBC Good Food 101 Cakes & Bakes book that I like to adapt to include different flavours now and then. This combination of sweet, creamy Milka chocolate and crunchy hazelnuts is one of my favourites (and yes, I’m on a bit of a Milka kick at the moment!).

As always, these cookies were incredibly quick and easy to make. I swapped the 175g of orange-flavoured chocolate for 100g of ‘plain’ Milka (Alpine Milk flavour) and 100g of hazelnut Milka, which is a bit difficult to find in the shops at the moment, but I had some in the cupboard from when – happiest of days – a shop near me sold some for 59p a bar not too long ago. I broke up the chocolate very roughly (the cookies are best with massive chunks of chocolate in them!) and also roughly chopped the hazelnuts.

Milka chocolate and hazelnut cookie mix

Milka chocolate and hazelnut cookie mix

I learned my lesson from the last time I made these cookies and made sure to space them out on the baking trays so I wouldn’t end up with one giant cookie (as fun as that sounds…!). They were done in less than 20 minutes and absolutely perfect – crunchy round the edges, soft and gooey with melted chocolate in the middle.

And that’s it! They were absolutely delicious and seemed to disappear very quickly. I don’t think I’ll ever get sick of them!

Milka chocolate and hazelnut cookies

The recipe

Adapted from BBC Good Food 1o1 Cakes & Bakes.

First bake: Milka chocolate and caramel muffins

Milka chocolate and caramel muffins

As I have a bit of a thing for purple, cows and chocolate, it’s perhaps no surprise that my favourite chocolate brand is Milka. I rarely bake with it (as it’s milk chocolate rather than dark), but I do occasionally like to throw it into the odd chocolatey bake. I did this a few days ago when experimenting with a variation on my beloved BBC Good Food triple chocolate muffins.

I had quite a lot of caramel left over from last week’s caramel banana blondies, so I thought I’d attempt to bake some chocolate muffins with a gooey caramel centre. I’d never really done this before so it was a bit of a gamble!

I started off by making the wet and dry mixes for the muffins as per the recipe, swapping the white chocolate in the original recipe with extra milk(a) chocolate and reducing the amount of dark chocolate. I kept the amount of cocoa powder the same, however.

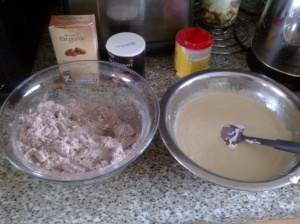
Milka chocolate and caramel muffin dry and wet mixes

Dry and wet muffin mixes, before combining

Then I combined the two to create a wonderfully rich muffin mix:

Milka chocolate and caramel muffin mix

Milka chocolate and caramel muffin mix

Next, I spooned two-thirds of the mix into the muffin cases and added a generous blob of caramel on top, before spooning over the rest of the muffin mix. I used Nestle Carnation caramel from a tin, but you can make your own if you’re good at it (I’m not!). I was careful to cover as much of the caramel as possible with the top layer of mix to avoid burning.

Muffin mix, pre-baking

Muffin mix, pre-baking. The one in the top left corner is complete – two layers of mix with caramel in between.

Caramel

Gooey caramel…

Then the muffins went into the oven for 20 minutes. Some of the caramel bubbled up to the top of the muffins, but there weren’t any burning issues, thankfully! I left them to cool for a few minutes before attemping to break one open to see how successful I was with creating a gooey centre…

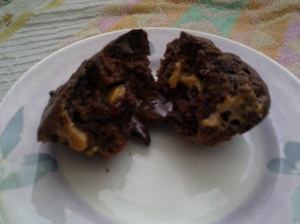
Milka chocolate and caramel muffin

A Milka chocolate and caramel muffin, warm from the oven

Well, they were gooey alright, but not quite in the way I expected. The caramel dispersed throughout the muffins in little blobs, rather than staying in one big blob in the middle. I suspect this is because the muffin mix was pretty gooey itself to begin with! There was also some gooey melted chocolate, which is par for the course (and extremely welcome) in the original recipe.

Taste-wise, the muffins were very chocolatey. I couldn’t taste much of the caramel in the first muffin I had, but the next one was pretty spot on, so I think the first muffin just didn’t have enough caramel in it. Some of the chocolate chunks didn’t melt, resulting in a wonderful combination of textures – liquid caramel/melted chocolate, cakey muffin and hard chocolate bits.

Everyone who tried a muffin really enjoyed them, and I’m very pleased with how they turned out. I think if (when) I make them again I’ll add more caramel, but that’s probably the only change I’ll make.

Now to decide what to do with the rest of the leftover caramel…!

The recipe

Based on the recipe for triple chocolate chunk muffins from BBC Good Food 101 Cakes & Bakes.

  • 250g plain flour
  • 25g cocoa powder
  • 2 tsp baking powder
  • 0.5 tsp bicarbonate of soda
  • 200g Milka Alpine Milk chocolate (or any other milk chocolate), broken into chunks
  • 50g dark chocolate
  • 2 eggs, beaten
  • 284ml soured cream
  • 85g light muscovado sugar
  • 85g melted butter
  • 12 generous tsp caramel (I used Nestle Carnation caramel)

1. Preheat the oven to 200C/gas 6/180C fan oven. Place 12 paper cases in a muffin tin (or butter the holes themselves if you’re not using cases).

2. Mix the flour, cocoa, baking powder, bicarbonate of soda and chocolate in a large bowl. Set aside.

3. Mix the eggs, soured cream, sugar and butter in another bowl.

4. Add the wet mixture to the flour mix and stir until just combined and the mixture is fairly stiff, but don’t overmix.

5. Spoon two-thirds of the mixture into the paper cases/muffin tin holes, then top each one with a generous teaspoon of caramel (you can add more if you’re able to). Divide the remaining muffin mix among the 12 cases/holes by spooning a blob of mix on top of the caramel, making sure to cover as much of the caramel as possible to avoid burning/bubbling.

6. Bake for 20 minutes until well risen. Leave in the tins for 15 minutes as the mixture will be quite tender. Remove from the tin and cool on a wire rack.

First bake: banana cake with pecan crumble crunch

Banana pecan cake

This is the other thing I made with the leftover bananas at work last week. It took much longer than the caramel banana blondies, but was still a success! I love using pecans in baking, so this cake really appealed to me.

There were quite a few stages to making this cake; making the crumble topping, mixing the dry and wet ingredients separately, whisking the egg whites, and combining everything together. It also seemed to take me an inordinately long time to line the cake tin!

Crumble for banana pecan cake

Crumble for banana pecan cake

The crumble topping was simple to make – pecans, sugar, nuts and a little flour were rubbed together to create a crumb-like texture. The other stages were also pretty simple, although I was a bit worried my bowl wasn’t big enough at one point when I’d combined the wet and dry ingredients, but had yet to add the egg whites.

Banana pecan cake mix, pre-egg whites

Banana pecan cake mix, pre-egg whites

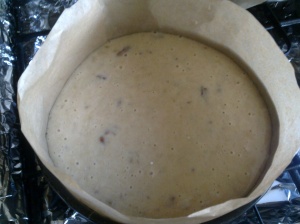
Luckily, the egg whites just about managed to fit into the bowl. I had to bake the cake for a good while longer than the recipe said; the cake ended up pretty tall and it was a good job I’d lined the tin with a sheet of paper that stood higher than the actual tin.

Banana pecan cake mix in tin

Banana pecan cake mix in tin

The cake itself was lovely. The banana flavour was very strong, and the hint of cinnamon together with the pecans rounded things off perfectly. The cake was a little soft at the bottom where it hadn’t completely cooked through, but it was still edible! Plus, it was very light thanks to the use of oil instead of butter.

I don’t think the crumble topping was as crunchy as it could have been, but that might have been because I only got round to trying a piece the day after baking it.

Banana pecan cake

The recipe

From BBC Good Food here: http://www.bbcgoodfood.com/recipes/6067/banana-cake-with-pecan-crumble-crunch

First bake: caramel banana blondies

Caramel banana blondies

We get a weekly delivery of fruit at work, and as we had some extremely ripe bananas going begging from a previous delivery, I thought I’d claim them to bake some lovely banana-based goodies. The first thing I made was these caramel banana blondies – or white chocolate brownies.

The blondies were unbelievably easy to make. I think I got the whole thing done in about 45 minutes. Melting the butter, sugar, caramel and chocolate together made things much easier (no spending ages trying to cream the butter with a whisk).

Caramel banana blondies ingredients

Melting the ingredients for caramel banana blondies

I deviated from the recipe a little after reading some of the comments on it. I halved the amount of sugar and also took the blondies out of the oven after 30 minutes, rather than 45.

Caramel banana blondie mix

Caramel banana blondie mix, pre-baking

I thought 250g of sugar seemed far too much considering there’s white chocolate and caramel too – not to mention the sweetness of the ripe bananas. Halving the sugar worked fine and they were definitely sweet enough (perhaps even still a little too sweet!). Taking the blondies out early also meant they stayed squidgy and suitably brownie-like.

Giant caramel banana blondie

Giant caramel banana blondie!

Overall, the blondies were excellent and adding blobs of caramel to the top before baking meant there were some lovely gooey bits in the middle of them. I would definitely make these again, sticking to my changes to the original recipe.

The recipe

From BBC Good Food here: http://www.bbcgoodfood.com/recipes/9962/caramel-banana-blondies

Adventures in cake decorating (part 4)

Handbag cake topper

Handbag cake topper

This is the final post in my cake decorating series (sob!) and covers the last two weeks of the course, both of which involved novelty cake toppers.

The penultimate class saw us attempt to make some handbag cake decorations using Mexican paste and some rather nifty templates. The premise is pretty simple – carefully cut out a handbag shape for folding up, stick the edges together with glue, and decorate. Unfortunately my Mexican paste turned out rubbish again (despite following my tutor’s advice to grind up the tylo powder first), and it cracked quite a lot. The bag I made in the class was a disaster and wouldn’t hold together, so I made another one when I got home (in the picture above) that was slightly better, but not much.

Some of the other women went all out and made lots of perfect bags complete with long straps and piped lettering, but I settled for a simple purple clutch instead, as I imagine that’s what would go on any birthday cake of mine! I would like to try this again with some Mexican paste that actually works, so I may resign myself to buying some so I can make a perfect bag too.

String footballer cake topper

String footballer cake topper

The final week saw us attempt to make a ‘string person’ using the dreaded Mexican paste and strawberry laces (we did have to sample some of the strawberry laces first in the name of research, of course). I loved making this model – perhaps because I used some paste my tutor had made! – and it was probably my second favourite part of the course after the Mexican paste lily.

As you can see, the feet, socks, shorts, top, hands and head were all made from Mexican paste, with holes carefully hollowed out in the relevant places for the insertion of the strawberry laces. The body was kept upright with the help of uncooked spaghetti thrust vertically down the neck – we could then snap off most of the protruding bit of spaghetti and stick the head on top. The eyes are little holes filled with royal icing.

This was really fun to make and I’d quite like to have a go at making other string figures – especially a cow!

So, that was the end of my adventures in cake decorating. It was an extremely positive experience overall. I think I surprised myself with some of the things I was able to do, although there was definitely room for improvement in a lot of areas. I’ll try to get some practice in at home when I get time, and maybe think about enrolling on another course in future to make sure my newly acquired skills aren’t forgotten!

I would definitely recommend looking up your nearest cake decorating course if you think you might like to give it a go. Mine took place at my local community centre and is run by one of the colleges in town, so maybe have a look at what your local college has to offer!

Recipes from around the web

Flour

Credit: WordRidden (Flickr)

I follow quite a few baking blogs/websites now, so I thought it would be nice to share the recipes I’ve recently stumbled across that I’ve added to my ‘to bake’ list. Hopefully I’ll make this a fairly regular feature on the blog!

1) Coconut and raspberry set cheesecake (The Caked Crusader)

Considering how much I love coconut, it’s crazy that I’ve never even thought of using it in a cheesecake before. This looks absolutely divine!

2) Coconut mascarpone cake with mascarpone cream (Dan Lepard for the Guardian)

Yes, it’s coconut again. Dan Lepard made this cake for his recent civil partnership ceremony. It’s properly spectacular and a cake I would love to be surprised with on a special occasion. (Hint hint. Anyone? Oh, never mind).

3) Tres leches cake (Something for the Weekend)

Okay, I came across this on TV a fair while ago (when Something for the Weekend (RIP) still existed, obviously) but it’s never far from my mind. Just look at all that creamy dairy goodness…

4) Chocolate chunk peanut butter cake (Cake, Crumbs and Cooking)

So good it’s all gone before anyone can take a photo of it, apparently. As I’ve blogged before, chocolate and peanut butter is a most excellent combination, and one I definitely want to indulge in again soon.

5) Black Forest gâteau (BBC Good Food)

My version of this would never look as neat as it does in the picture, but I would certainly have fun eating cleaning up the mess.

What recipes have you got your eye on for making in the near future?

Re-bake: courgette and mozzarella muffins

Courgette and mozzarella muffins

As you may have gathered, I do a lot of baking. Among the things I’ve baked the most are these delicious courgette and mozzarella savoury muffins from a recipe by the baking genius that is Dan Lepard.

This recipe has many of my favourite ingredients – with courgette, chilli, cheese and parsley all in there, this is a dream bake for me! It’s also super easy to make, employing one of my favourite methods: throw it all in a bowl, then mix and bake. So simple!

Some notes on the ingredients: courgettes are widely available now, as they’re a summer vegetable that seems to keep growing whether gardeners would like it to or not! So they’re pretty cheap at the moment. Mozzarella can be expensive, but I recently discovered that Morrisons has included the cheese in its new ‘Savers’ range, which is the equivalent of Asda Smartprice and Tesco Value. At 44p for 125g, it’s definitely the cheapest I’ve come across in all the time I’ve been making this recipe, and it tastes fine, so I would recommend finding your nearest Morrisons if you’re on a budget.

Back to the muffins, then. Being a pescetarian, I make the vegetarian version of this recipe, which replaces the smoked ham with smoked paprika. Add to this the generous helping of chilli flakes, and you have some wonderfully spicy muffins! The spice level is perfect, in my opinion, but if you don’t get on with chilli it’s probably a good idea to reduce the amount you put in by one or two teaspoons. I had to use red onion instead of white this time, and I only had frozen parsley as opposed to fresh, but that didn’t make much of a difference to the overall flavour.

As with most muffin recipes, the key is to not overdo it when stirring the mix. I always mix until the ingredients have just come together (for me, it’s when it’s mostly combined, but I can still see some bits of unmixed flour in the bowl). Overmixing can result in hard, dense muffins that fail to rise, so keep an eye on what you’re doing!

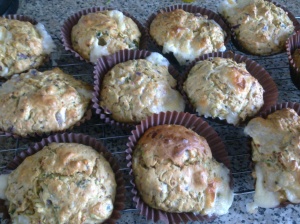
You can eat these while they’re still warm, but they’ll most likely still be a little soft in the middle, so try to resist temptation until they’re completely cool and you’ll find them easier to eat. I also think they’re tastier when cold, but then I’m the sort of freak who likes cold cheesy pasta and pizza!

Courgette and mozzarella muffins

The recipe

Get the recipe from Dan Lepard’s Guardian column here: http://www.guardian.co.uk/lifeandstyle/2010/apr/10/courgette-mozzarella-muffin-recipe

First bake: cherry Bakewell cake

Cherry Bakewell cake

Cherry and almond is one of those classic flavour combinations that’s best in a Bakewell tart (although a traditional tart uses strawberry jam, not cherry!). It’s one of my favourite pairings, so I was intrigued when BBC Good Food added a slew of Bakewell-based cake recipes to their website last year. I baked this cherry Bakewell cake after adapting a recipe for a raspberry version – and it’s truly delicious.

The great thing about this cake is how easy it is to make. You throw everything into a bowl/food processor and mix, then layer the mix with fresh cherries in the tin and top with flaked almonds. And that’s it! My version takes a little longer than BBC Good Food’s raspberry cake, because of the process of taking the stones out of the cherries, but it’s well worth it.

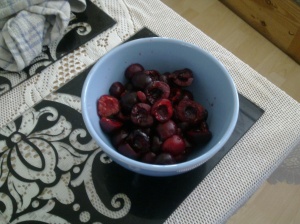
De-stoned cherries

De-stoned cherries

De-stoning cherries is pretty easy – I do it in the same way as when I de-stone olives. I slice them around the middle then twist half of the fruit away, and pick out the stone from the other half. You end up with some nice, neat cherry halves as a result (see above).

I don’t have a food processor big enough for a cake mix, so I just threw all the ingredients in a bowl and beat them together, which seemed to work fine and didn’t take too long at all. I never seem to have golden caster sugar in, so I mixed normal caster sugar with light muscovado sugar.

The recipe calls for 140g of ground almonds, but as the bag I bought was 150g, I thought ‘what the hell?’ and put the whole lot in. I also switched the teaspoon of vanilla extract for half a teaspoon of almond extract and half of vanilla, which adds an extra almondy dimension to the cake that I think brings it very close to the flavour of a proper Bakewell tart.

Cherry Bakewell cake mix in the tin

Cherry Bakewell cake mix in the tin

Cherry Bakewell cake mix in the tin

Cherry Bakewell cake mix in the tin, with almonds

Layering the mix and cherries is a doddle. The mix is thick enough to be spreadable with a spatula, and then you simply throw the cherries on top and spread the other half of the mix over them. Then, scatter with flaked almonds and it’s ready to go! I found I had to leave it in the oven for a good 20 minutes or so longer than the original recipe says, but I think that’s because cherries are much juicier than raspberries, making the overall cake more moist.

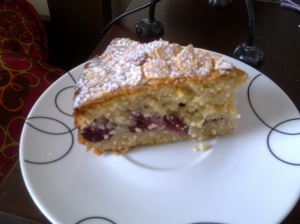
The final result is pretty damn good. The almond flavour is really, really intense – thanks to my addition of almond extract and extra ground almonds. The cherries themselves are cooked beautifully – they were quite sour when raw, but end up with just enough sweetness when baked in the cake. There’s not much I’d do next time to improve on the recipe, although one of the commenters on the original recipe suggests adding blobs of cherry jam too, which I might try to get some extra cherry flavour in there.

Cherry Bakewell cake

The recipe

Adapted from BBC Good Food’s raspberry Bakewell cake recipe:

Serves 8

  • 150g ground almonds
  • 140g butter , softened
  • 140g golden caster sugar (or 70g caster sugar and 70g light muscovado sugar)
  • 140g self-raising flour
  • 2 eggs
  • 1/2 tsp vanilla extract
  • 1/2 tsp almond extract
  • 250g cherries, de-stoned and sliced in half
  • 2 tbsp flaked almonds
  • icing sugar, to serve
  1. Heat oven to 180C/160C fan/gas 4 and base-line and grease a deep 20cm loose-bottomed cake tin.
  2. Blitz the ground almonds, butter, sugar, flour, eggs and vanilla extract in a food processor or beat together in a large bowl until well combined.
  3. Spread half the mix over the cake tin and smooth over the top. Scatter the cherries over, then dollop the remaining cake mixture on top and roughly spread – you might find this easier to do with your fingers.
  4. Scatter with flaked almonds and bake for 50 mins until golden. Insert a skewer into the middle of the cake – if there’s cake mix clinging to it, bake for 10 to 20 mins longer. Cool, remove from the tin and dust with icing sugar to serve.