Grasmere ginger shortbread + a blogging hiatus

Grasmere ginger shortbreadI’ve been on quite the ginger kick recently, haven’t I?! I decided to follow the ginger and coconut flapjacks I made last time with this Grasmere ginger shortbread, completely forgetting that I’d already made something gingery that week… oh well.

The recipe for this comes from good ol’ Delia, who says she got the recipe from a hotel in the Lake District. I’ve been intrigued by this recipe since I first saw it in the recipe book, because I’m a huge fan of the Grasmere gingerbread that’s sold in the village of the same name – it’s just the BEST gingerbread you’ll ever have.

The recipe is supposed to be a closely held secret (and quite rightly so), so I was interested to see what this version was like – and, as it turns, out, it’s really not the same thing at all!

Don’t get me wrong, Delia’s shortbread is delicious, but it’s nothing like the real thing. Grasmere gingerbread is a bit more chewy and infinitely more gingery than Delia’s take, and the oatmeal is very noticeable here – if it’s used in the original Grasmere gingerbread recipe, I’ve never been able to tell.

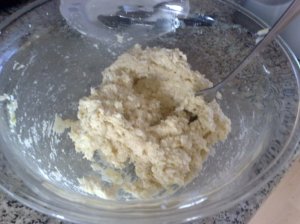
As you can see from the first photo above, I ended up with some rustic-looking shortbread – the ragged edges are due to the outside of the bake breaking away when I tried to release it from the tin. I think the shortbread needs to cool for a lot longer than 5 minutes before you try to turn it out!

Nevertheless, Delia’s Grasmere ginger shortbread is really nice – it’s just a touch disappointing if you’ve ever stood on top of a hill in the Lakes, drinking in the amazing views while nibbling on some proper Grasmere gingerbread.

Grasmere ginger shortbread
Finally, just a note that you won’t hear from me for a bit, because I’m getting married next weekend! We’re off to Sri Lanka for our honeymoon, and I’m running the Great Manchester 10k for the Red Cross three days after we get back (you can sponsor me here if you like!), so you probably won’t hear from me until closer to June.

I will hopefully have lots of new, exotic baking ideas from our trip, though, so it’ll be worth the wait! See you on the other side!

Spiced oat thins

Spiced oat thinsI really am on an autumnal baking kick at the moment! I couldn’t quite let go of my spices after the rye apple and cinnamon cake I posted about last time, so I decided to knock up these spiced oat thins from Ruby Tandoh’s book, Crumb, one lazy Sunday afternoon.

This recipe (which I can’t find online, unfortunately, hence the lack of a link) contains an impressive list of spices, but they should be things that are in the cupboard anyway if you bake fairly regularly. The biscuits contain cloves, ginger, cinnamon, allspice and black pepper – nothing too exotic, but combined, they make for a rather spectacular flavour.

Spiced oat thins
The biscuits were really easy to make – you just melt unsalted butter, golden syrup and dark brown sugar in a pan, before stirring in the spices and then the plain flour and rolled oats. And that’s it!

The recipe says it makes 18 spiced oat thins, but I got a bit more out of the mixture, which is always nice. They should spread a fair bit in the oven, but I found this wasn’t consistent across all of the thins, which is probably due to my oven having areas that are hotter than others.

Spiced oat thins
These really were delicious – they reminded me a bit of parkin, but in biscuit form! The chewy yet crispy texture is lovely, and goes perfectly with a cup of tea. The spices come through very well – and they also make the house smell rather nice when they’re in the oven. This would be a great bake for (dare I say it) Christmas, or just any time of the year, really. It’s worth getting hold of Ruby’s book for this recipe alone!

Cream crackers

Cream crackersI think I must like baking a little too much when I reckon it’s less effort to make a batch of cream crackers than nip 5 minutes down the road to the shop to buy some! Seriously, that’s exactly what I did. I must be crackers (sorry).

As this was a bit of a spontaneous effort, I pretty much alighted on the first British recipe for cream crackers that I found online and went with it. I had a look at a couple of US recipes, but I was very confused by the addition of actual cream to the mix… I’m pretty sure that’s not required!

Cream crackers
The dough was pretty straightforward to make (although it was a little difficult getting the dough to flatten out), but I was a little flummoxed by the actual baking of the crackers. The recipe suggests that gas mark 4 is too low, so I baked the first batch at 5, but they were still a little doughy well after the baking time was up.

However, I hit the jackpot with the second batch – they went in at gas mark 6 and voila! Perfect cream crackers after 20 minutes of baking. I think it also helped that I’d tried to flatten the dough a bit more than with the first batch. The photo directly below is of the first batch, whereas the other photos in this post are of the second batch. I think you can see a definite difference between the two.

Cream crackers
I was actually really surprised by how much they tasted like shop-bought cream crackers. It’s definitely the quality of the butter and the seasoning that makes them so perfect, so be sure to use a decent butter and don’t forget the salt!

The recipe below is my version of the one I used, with tweaks to show what worked for me. Do get the dough as flat as you possibly can – it really does make a difference to the crispiness of the crackers.

Cream crackers
Cream crackers recipe

Based on this recipe

Makes around 25 crackers, depending on size and shape

  • 225g self-raising flour
  • 0.5 tsp salt
  • 55g good quality salted butter
  • Cold water

Method:

  1. Pre-heat the oven to gas mark 6/200C/180C fan. Line 1-2 baking trays with greaseproof paper.
  2. Sift the flour and salt into a bowl. Rub in the butter with your fingertips until the mix resembles fine breadcrumbs.
  3. Add the water a little at a time and mix until you end up with a manageable dough that’s not too sticky.
  4. On a floured surface, roll the dough into a rough oblong, making it as thin as possible.
  5. Mark the oblong lightly into three equal sections, fold one third over the middle and fold the opposite third on top. Turn the oblong 90 degrees and roll flat again before folding again.
  6. Repeat this process once more, keeping the dough as thin as you possibly can all the while.
  7. Trim any curved/rough edges with a knife, then cut the dough into squares or rectangles. Prick each one with a fork and transfer to the baking trays.
  8. Bake the crackers for 20 minutes, until golden and beginning to turn dark brown around the edges.
  9. Remove from the oven and leave to cool completely before eating.

Ginger nut biscuits

Ginger nut biscuits
Well, hello! It’s been a while since my last post, but I’ve finally got my act together to blog about these rather stupendous ginger nut biscuits I baked yesterday.

I have been baking – I’ve actually made three (!) batches of mince pies since I last posted! As I’ve already said pretty much everything there is to say about them, though, I won’t subject you to more of the same.

Back to the ginger nuts. Felicity Cloake of the Guardian wrote a column earlier in the week with a recipe for her perfect ginger nut biscuits, based on extensive research as always and with copious amounts of spices, including two types of ginger, cinnamon, allspice and nutmeg. I do love a good ginger nut or five (with compulsory tea dunking) and just so happened to have all of the ingredients in, so I thought I’d give it a whirl.

The recipe starts off with a pretty basic method for making biscuit dough. I used my stand mixer, which took a lot of the legwork (or should that be armwork?) out of things. I hit a stumbling block when it came to the rolling and chilling, though.

Ginger nut biscuits

Ginger nut biscuits, pre-baking

The recipe calls for the dough to be rolled out to 1cm thick before being wrapped in clingfilm and refrigerated for a couple of hours. Now, the thought of attempting to wrap a large, fragile piece of flat dough in pesky clingfilm worried me somewhat, so I thought I’d split the dough in two to make things simpler. It was still a faff, though, and the dough kept breaking. Next time I’ll cut out the biscuits first and chill them on the trays to make things a bit simpler.

It was plain sailing from then on. Baking was straightforward and the biscuits were indeed baked to perfection after 25 mins (although you can’t really tell because the dough is already dark by this point, and doesn’t change colour in the oven). This is only if they stay on the top shelf for the duration – I did a bit of swapping of trays across the top and middle shelf to try to get an even bake, but ended up with some slightly softer ones – ideally, the biscuits should have a bit of a snap to them.

Ginger nut biscuits
Regardless of whether they were properly baked or not, the biscuits ended up being absolutely delicious. I found them to be a bit spicier than your average shop-bought ginger nut, which is excellent, and perfect for dunking in a good strong brew. The crystallised ginger really makes these biscuits special, and well worth the effort if you have a craving for a good quality ginger biscuit. All in all, I would most certainly make these again!

Ginger nut biscuits
The recipe

Can be found on the Guardian website here: http://www.theguardian.com/lifeandstyle/wordofmouth/2014/nov/20/how-to-make-perfect-ginger-nut-biscuits

Anzac biscuits

Anzac biscuits

I realised after watching this week’s excellent episode of Great British Bake Off that it’s been a long time since I last made biscuits. I thought I might try a fancy biscuit involving pistachios, but after nearly fainting at the price of a bag of pistachios in my local supermarket, I decided to make do with what I already had in and bake these delightful Anzac biscuits.

Anzac biscuits

Anzac biscuits are so-called because they were made by the wives and girlfriends of Australian and New Zealand troops going off to fight abroad during World War I. Any food sent to the army at that time had to be sturdy enough to withstand the journey while also being able to keep for a long time without spoiling. Add to that the fact that key baking ingredients like eggs were in short supply and you can imagine the conundrum facing the soldiers’ other halves!

Anzac biscuits

Luckily, they came up with this easy recipe for Anzac biscuits, which consists of oats, dessicated coconut, flour, butter, sugar, golden syrup and bicarbonate of soda mixed with a little boiling water. It looks like the recipe I used is pretty much exactly the same as the one that was used during the war, which surprised me as it really is a lovely biscuit and I tend to imagine soldiers’ food as being pretty grim (I’m reading Birdsong by Sebastian Faulks at the moment and the soldiers in the war don’t exactly get well fed).

Anzac biscuits

The method involved mixing together the dry ingredients, stirring the syrup into melted butter, then stirring the bicarbonate of soda and water mixture into the butter and adding the whole lot to the dry mix. Easy! I found that the biscuits were definitely done after 9 minutes on the top shelf of my gas oven. Like most biscuits, they seem quite soft to begin with, but harden once cooled on a wire rack.

Anzac biscuits

The biscuits are extremely delicious thanks to the heavenly combination of oats, coconut and golden syrup. I can imagine that these would have sustained the Anzac troops rather well! In peacetime, the biscuits are lovely as a mid-morning or afternoon treat with a good, strong cup of tea.

The recipe

Can be found on the BBC Good Website here: http://www.bbcgoodfood.com/recipes/3803/anzac-biscuits

Housewarming afternoon tea

Housewarming afternoon teaNearly three months after moving into my first house, I finally got round to holding a housewarming do last weekend. Rather than opt for a standard party that would probably result in lasting damage to my new investment, I decided to hold a family afternoon tea – the perfect excuse to bake an awful lot.

My boyfriend and I split the baking duties after coming up with what seemed like a reasonable list of goodies to make for 11 people, including 2 small children who probably wouldn’t eat much. We both started preparations the day before, and must have put in almost 24 hours of graft between us altogether!

All of our savoury options were vegetarian, due to me being a pescetarian and my boyfriend being veggie. However, my mum brought the savoury stars of the show, some chicken samosas (not pictured), to appease those with meatier appetites. She also brought some onion bhajias for us non meat eaters – despite suffering from some horrible jet lag after a recent trip to India. What a trooper!

Housewarming afternoon tea sandwiches

Sandwiches – egg & cress, or possibly savoury cheese

Housewarming afternoon tea sandwiches

More sandwiches

Housewarming afternoon tea mini Caesar salads

Mini caesar salads

My favourite part was, of course, the sweet baking…

Housewarming afternoon tea Victoria sponge

Victoria sponge

Housewarming afternoon tea toffee brownies

Toffee brownies

Housewarming afternoon tea scones

Plain and fruit scones. Served with clotted cream and a choice of raspberry or strawberry jam.

Housewarming afternoon tea brandysnaps

Brandysnaps

Housewarming afternoon tea Viennese whirls

Viennese whirls, with some Viennese fingers lurking behind them

Housewarming afternoon tea Victoria sponge

Another pic of the Victoria sponge, just because. Along with some cucumber sandwiches. Making a starring guest appearance: ELEPHANT TEAPOT

The tea of choice was some loose Ceylon from Whittard’s, which I would highly, highly recommend for its fresh, delicate flavour – the perfect accompaniment to afternoon tea.

All in all, the event was a huge success, as evidenced by the coma-like silence as everyone sat around clutching at their stomachs towards the end. I was worried about there not being enough, but there was so much left over that we held another afternoon tea with the leftovers for some friends the next day! And there was STILL a lot left over from that, so I made everyone take some goodies home with them.

Housewarming afternoon teaBelow is a list of everything that was made and, where relevant, where the recipes came from and links to any previous posts about them:

First bake: Viennese whirls

Viennese whirlsMy boyfriend has been pestering me to make Viennese whirls for YEARS. Then he bought me a biscuit maker as a ‘housewarming present’, so I had to make them. Of course. But I’m glad I (or we – he did at least help) got round to it – these lovely little treats are absolutely divine!

The biscuit dough was pretty easy to make – the recipe I used (from the Hairy Bikers) called for everything to be mixed in a food processor, but I had to use an electric hand whisk due to the tiny proportions of my food processor. We reached a slight sticking point when attempting to use the biscuit maker for the first time – it took a bit of trial and error, but we managed to go from producing weird little lumps to churning out lovely star-shaped beauties.

Viennese whirls, pre-baking

Viennese whirls, pre-baking

My biscuit maker. Put the dough in, choose the right attachment and push down on the handle

My biscuit maker. Put the dough in, choose the right attachment and push down on the handle.

Viennese whirls, fresh from the oven

Viennese whirls, fresh from the oven

They only took 13 minutes to bake, although we ended up baking many, many batches so it took a bit longer than that! Once they’d cooled, we sandwiched them together with buttercream and seedless raspberry jam. And ate about a hundred during the process, for, erm, testing purposes.

Viennese whirlsI cannot emphasise enough just how lovely these are. The biscuit is beautifully rich (and I should think so, what with a WHOLE BLOCK OF BUTTER going in the mix) and is set off perfectly by the sweet buttercream and fruity jam. It’s really, really hard to eat just one, or three, or ten. So be warned!

Viennese whirls

The recipe

On the BBC Food website here: http://www.bbc.co.uk/food/recipes/viennese_whirls_78348

First bake: lime and coconut biscuits

Lime and coconut biscuits


After finally using up all my mincemeat I was at a bit of a loss over what to bake next. I didn’t want to do anything too difficult or substantial, so I decided on this rather interesting recipe for lime and coconut biscuits that I found online a few months ago.

As you all know by now, I bloody love coconut. I also love lime, but usually only ever have it in cocktails! So I was quite intrigued by the combination of the two flavours.

The biscuits were very easy to make; I knocked them up on Sunday morning, having not had much sleep, and managed to not make any mistakes! (I know!) It was just a case of mixing everything together, topping with coconut, baking and icing.

Lime and coconut biscuit mix

Lime and coconut biscuit mix

I didn’t have any coconut shreds, whatever they may be, so I just topped the biscuits with extra dessicated coconut, making them look a bit like macaroons (not macarons). My icing was a bit on the watery side, but the lime flavour came through really strongly in spite of this.

Lime and coconut biscuitsThe biscuits tasted amazing – very coconutty and very, very limey. I think they could have done with longer in the oven than the recipe suggests, because they were quite big and weren’t quite as crunchy as I would have liked, so I would recommend leaving them in for around 10 minutes longer if yours come out large too.

The recipe

On Eggrecipes.co.uk here: http://www.eggrecipes.co.uk/recipes/view/lime-and-coconut-crunchy-biscuits

First bake: ginger and chilli biscuits

Ginger and chilli biscuits

Ginger and chilli are two excellent flavours that go together extremely well – in curries, that is. So I was rather intrigued when I came across this recipe for ginger and chilli biscuits on the Caked Crusader blog a while ago – done right, I thought, these are surely the perfect biscuits for me!

I took the advice to make the dough in advance and chill it overnight. It was really easy to make – just cream the butter and sugar together and mix everything else in. I didn’t have any cayenne pepper, so I gingerly (ha!) threw in a little of my mum’s fiery hot red chilli powder. I did think about using paprika, but thought the flavour may be a little too subtle.

Ginger and chilli biscuit dough

Ginger and chilli biscuit dough

I followed the recipe to the letter, and got 55 (!) little biscuits out of the dough in the end. Unfortunately, as is usually the case these days, I had a mini disaster when I realised towards the end of baking the first batch that the oven dial had mysteriously turned itself down from 6 to 3 (or I was my usual absent-minded self and didn’t turn it up far enough). I whacked the heat up and left the biscuits in for a few minutes longer, and they seemed to look fine, albeit a bit more domed than I would have liked.

The second batch went in at the right temperature, but came out a little too brown, even though I took them out after the minimum 12 minutes. Doh! I was beginning to feel a bit like Goldilocks at this point, but soldiered on with the third batch (just 5 biscuits), which again came out a rather dark brown.

Ginger and chilli biscuits

I was desperate to try the finished product, and the biscuits cooled very quickly thanks to their small size. Despite all the browning, they turned out pretty perfectly – very gingery, with a hint of chilli that builds up the more you eat (and I had a lot of biscuits yesterday). They were pleasingly biscuity too, with a buttery taste and a good crunch to them.

I would definitely make these again, but perhaps either turn the oven down a touch or take the biscuits out sooner. I would also make them a little bigger to avoid the temptation of popping 5 or 6 in my mouth in quick succession, but, to be honest, I would probably do that regardless of their size!

The recipe

On the Caked Crusader blog here: http://www.thecakedcrusader.blogspot.co.uk/2011/10/ginger-and-chilli-biscuits.html

First bake: Lady Grey biscuits

Lady Grey biscuits

Twinings makes an excellent tea called Lady Grey that is a slightly fruity twist on good ol’ Earl Grey. It’s been a favourite of mine for several years, and a few days ago I decided to come up with a biscuit recipe based on the fresh, light flavours of the tea.

This recipe is loosely based on the rum and raisin biscuits I baked a couple of weeks ago, and also uses the excellent tea infusion method I incorporated into my tea masala cake recipe last month. I aimed to create a delicately flavoured biscuit that accentuates the lemon and orange flavours of Lady Grey.

I had to tweak the biscuit base a little, as it came out a little drier than when I made the rum and raisin biscuits – I suspect this is because the process of infusing the loose tea in the butter resulted in some of the butter clinging to the tea leaves that I discarded. I added a tablespoon of lemon juice and 2 tablespoons of milk to sort out this issue. As you can see in the picture below, the mix was still quite crumbly, but it was moist enough to press together into biscuits. I got 24 biscuits out of the mix altogether, which is about right.

Lady Grey biscuit mix

Lady Grey biscuit mix

I made sure to press the biscuits completely flat this time, which definitely paid off. The end result was biscuit-y with a ‘snap’ quality to the texture, rather than the more cookie-like ones I ended up with last time.

So, what did they taste like? While the zesty flavours of the orange and lemon definitely came through, I think I could have done with adding a lot more tea to the butter during the infusion process. I can barely taste the tea itself in the biscuit, which is a big shame! I used 2 teabags’ worth of Lady Grey (mainly because the icing for the tea masala cake had 2 teabags’ worth of Yorkshire Tea in it, which came out pleasingly strong), but I think I probably should have used 4 or 5, as Lady Grey is much more delicate than the robust flavours of Yorkshire Tea.

They’re still very nice biscuits, though – hopefully they will have more of a tea flavour the next time I bake them!

Lady Grey biscuits

The recipe

Based on The Caked Crusader’s rum and raisin biscuit recipe and Cupcake Project’s tea infusion method.

Makes approx. 25 biscuits

  • 225g unsalted butter
  • 140g caster sugar
  • ½ teaspoon vanilla extract
  • 1 egg yolk
  • 280g plain flour
  • 30g loose Lady Grey tea (or approx. 4-5 teabags’ worth)
  • zest of ½ lemon
  • zest of ¼ orange
  • milk, if needed
  • a little juice from the lemon/orange, if needed
  1. Heat the unsalted butter in a saucepan until just melted and add the tea. Heat gently for 5 minutes, remove from the heat and allow to stand for 5 minutes.
  1. Strain the mixture through a fine sieve (a tea strainer is ideal), pressing hard on the tea leaves, and remove any tea leaves from the strained mixture. Leave to cool to room temperature.
  1. Preheat the oven to 190°C/fan oven 170°C/375°F/gas mark 5. Line two baking sheets with baking paper.
  1. Beat together the butter and sugar until smooth and light. Beat in the vanilla and the egg yolk.
  1. Stir the flour and the zest into the mixture. Add a tablespoon of lemon or orange juice and/or 2 tbsp of milk if the mix looks too dry to bring together.
  1. Take tablespoons of the dough and place them 3cm apart on the baking sheets. You should get approximately 25.
  1. Press down on the biscuits so they are as flat as possible. If they are too domed they will be cakey in texture rather than biscuity.
  1. Bake for 15 minutes. They should be golden and crumbly around the edges, but still soft in the centre.
  1. Leave to cool completely on the baking sheets before storing in an airtight container. You will find that they have crisped up and are no longer soft in the centre. Serve with a cup of Lady Grey tea.